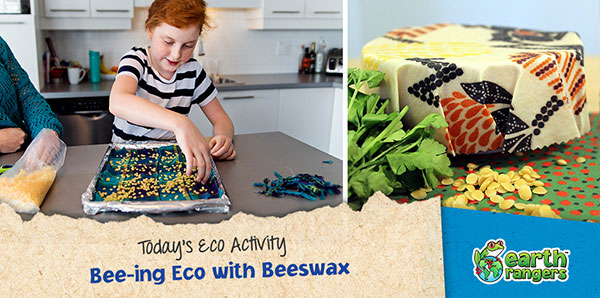
You might not think twice about covering your leftovers in plastic wrap, but it’s just another single-use plastic that’s hurting our planet. There are lots of reusable products you can use for storing your food instead, like the DIY beeswax wraps in today’s Eco-Activity!
Check out the instructions below, or follow along with this video.
Here’s what you’ll need:
- 100% cotton fabric
- Beeswax (check local farms, craft stores, or farmer’s markets!)
- Scissors
- A tool to spread the melted beeswax with, like a paintbrush, butter knife, or pallet knife
- Something to air dry the beeswax wraps with, like a hanger or clothespin
- An adult to help
Here’s how to make your wraps:
1. Cut out different sized square and rectangular shapes from your cotton fabric—choose sizes that will fit your lunchbox or the food dishes that you’ll be covering.
2. Place the sheets of cotton onto a baking sheet lined with parchment paper or a reusable baking mat.
3. Spread 1-3 tablespoons of beeswax pellets/shavings over half the cotton sheet. The amount you use will depend on the size of your fabric.
4. Fold the cotton sheets in half and place in the oven at 200°F for 3-4 minutes, or until the beeswax is melted.
5. Take the baking sheet out of the oven, unfold the fabric and spread the melted beeswax over the entire thing. Be careful when you do this because it could be hot!
6. Hang dry it for about 5 minutes. When the time is up, the wraps should be sticky but not overly so, and they shouldn’t be damp at all.
7. Use your reusable wraps for covering leftover food, wrapping up lunchbox snacks, and more! Remember to only wash your wrap in cool water because hot water might melt the wax.


Cool. Did you know you can make a bee house with a cardboard box and a tall plant called phragmites.
Okay
Okay
This seems amazing
I’m so glad to bee
Helping the environment
For the animals and trees
I love earth rangers because we get to help animals and the environment and the best thing is we get to do it all together ♥️
The bees help us grow don’t you all know with all there fruits and veggies
We aren’t able to do this.
We would be busy as a bee trying to get all of the ingredients.
And we don’t use plastic wrap, we use reusable containers.
We use reusable containers too.
Cool article about beeswax I will think about it
I did this super cool water bottle craft
Did you know honeyguide birds eat the beeswax, NOT the honey?